![[Click here for a LARGER picture]](http://www.glenn-ring.com/pics/engines.jpg)
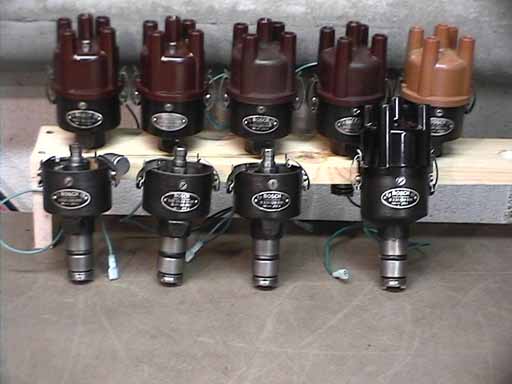
In the engine compartment, i swapped the ignition from the standard Bosch Blue Coil and 009 distributor to a Gene Berg Ignitor HEI system and a Bosch 010 distributor. The Berg Ignitor uses a high voltage coil controlled by a "black box". It still uses the points in the distributor to trigger the box, but they carry no current and will never pit. As long as you lube the distributor cam once a year, they should last forever. I also fully rebuilt the "old school" Bosch 010 distributor. I even found a source for German old style Dark Brown distributor caps. The Bosch 010 has the advance come in a lot sooner and it really gets the engine moving at a lower rpm.
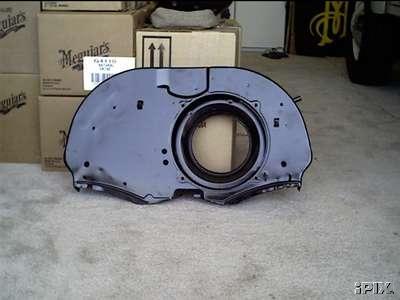
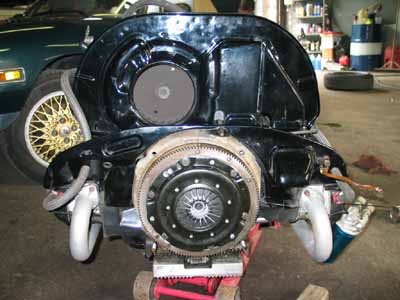
I replaced the stock late model Dog House fan shroud with a 1973 Type 181 (Thing) Dog House shroud. The Thing used a gas heater, so the fan shroud has no outlets for the fresh air to the heater boxes. It gives a much cleaner appearance and also cools better. I converted to a Type 4 oil cooler and modified the fan shroud so it would fit.
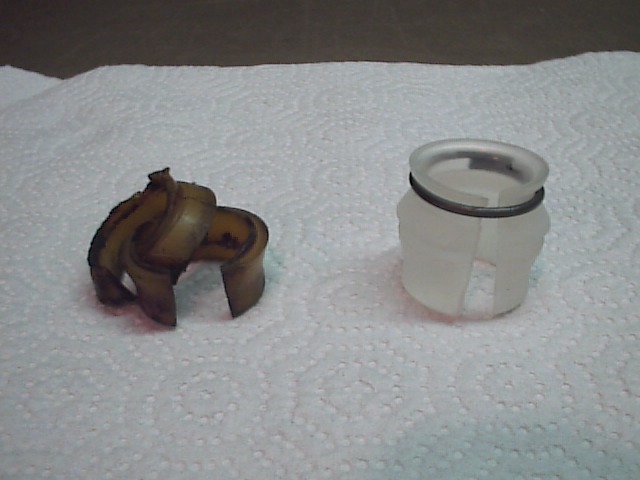
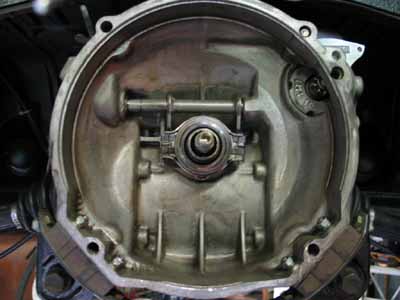
I had on odd problem with the tranny. When i downshifted from 3rd to 2nd, it would sometimes grind reverse. I made a quick call to Gary Berg, he built my Berg 5 tranny, and he asked if I replaced the shift rod bushing yet. I told him i never checked it and his reply was "check it". The bushing sits in the tunnel just behind the shifter. It supports the shift rod and could be the cause. I did notice that with the tranny in gear, i could move the shifter side to side with about 3 inches of play... not good thing. I only had to remove two 13mm bolts to get to the shift rod. When i grabbed the end of the rod, i could plainly see ther was way too much movement. I then proceeded to replace the bushing.
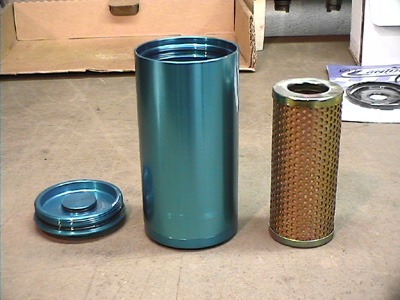
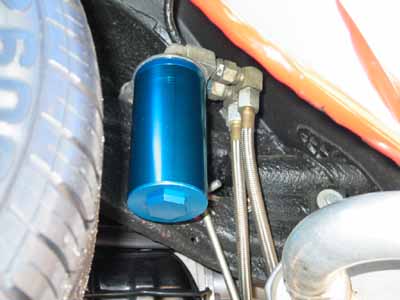
Another change was switching from using a Fram HP-1 oil filter to a Canton Mecca "Spin On" canister. The Canton Mecca uses a bullet proof canister along with a replacable cartridge. The cartridge is good for 20,000 miles of street use. I plan on draining it every oil change and replacing the element after 3 years. It filters down to 8 microns. That's alot smaller than any off the shelf filter. It's a bit of overkill, but who cares.
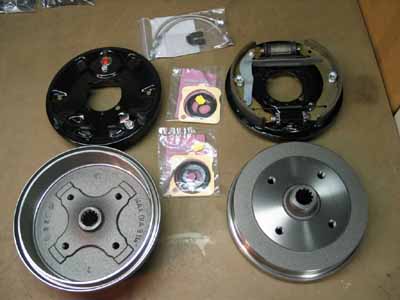
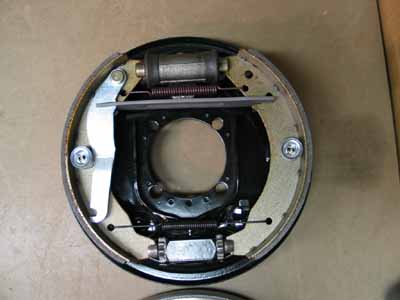
I finally got to replacing the rear brakes. The fronts were done when i did the lowered beam. The rears feature powder painted backing plates, Ate "German" drums, Mintex shoes, new "German" wheel cylinders and all new hardware. I even replaced the rubber hoses with steel braid hoses.
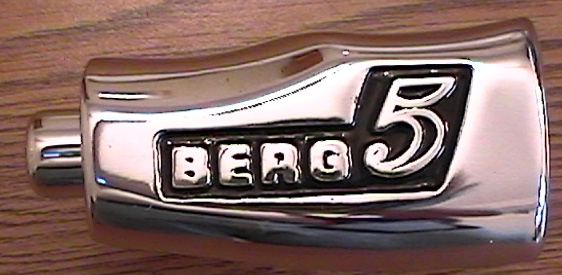
I also got my hands on a old style Berg 5 "Finger Grip" shifter handle. It was a bit rough when i got it, but a little detail and polishing and it looks great.
Well... that should bring everything upto date. I still haven't found a NOS 1975 Dash pad to replace the one in the car. It's a 1 year only part, so if you have one... let me know. I'm sure we can come to an agreement. I did find a NOS glove box. Not the black plastic ones, but a real gray felt one. And even found a NOS ashtray.

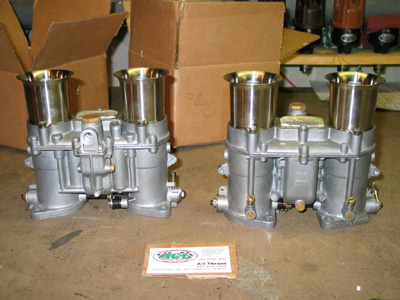
Here's my next upgrade. They're Italian Weber 48 IDAs that were just rebuilt by Art Thraen of Air Cooled Engineering. They'll be mounted on tall match ported manifolds. I'll also be using Uni Filters from AirCooled.Net to keep the dirt out.

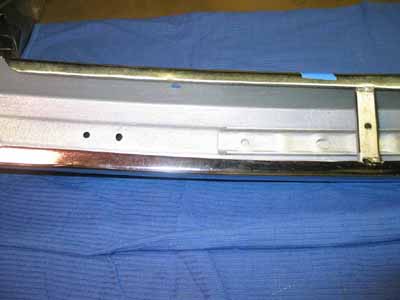
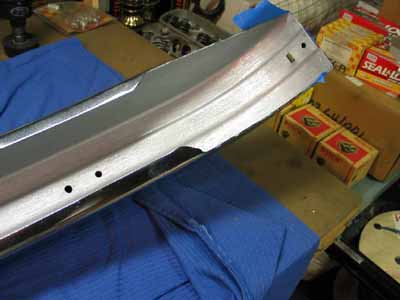
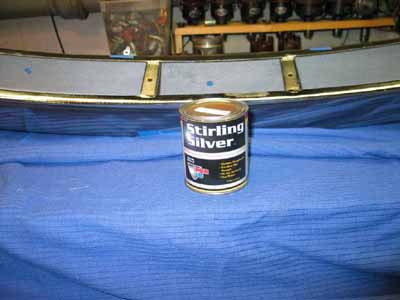
As with all POR 15 products it's all about the prep. I first sprayed on some POR 15 Metal Ready that eteched the surface and then washed it off. I let it sit overnight to ensure it was dry. Then I applied 2 thin coats of Stirling Silver allowing it to dry overnight between coats. As you can see from the pictures it came out great. I strongly suggest that you do this even if you buy new repro bumpers. Those are well known to start rusting within days.